Creating a Clipping Path in Photoshop
In a previous post, we discussed a simple method for creating a clipping path in Photoshop. In this article, we’ll delve into it in more detail with some basic steps. But first, let’s clarify both terms – Photoshop and Clipping Path.
What is Adobe Photoshop?
Layers in Photoshop function like stacked glass, allowing you to create the final project. They’re widely utilized for image compositions, editing, background removal, retouching, and mockups.
With Photoshop, we can manipulate images, apply various filters, shadows, and attractive designs. It’s immensely popular among graphic designers and photographers for its remarkable results.
Adobe Photoshop is a software application for editing, retouching, and creating images, illustrations, and artwork. It’s available for Windows and macOS computers. Photoshop can be used to edit photos, graphics, videos, 3D models, and text. It can also be used to create art digitally or work with virtual reality content creation software.
Photoshop is essential for graphic design tasks such as preparing images for print, color correction and retouching, creating composites, and designing graphics for digital displays.
Photographers use Photoshop for retouching photos, creating photo composites, and designing artwork and art prints.
Some of the essential tools for drawing in Photoshop include:
- Brush tool
- Pencil tool
- Eraser tool
- Pen tool
- Shape tool
- Gradient tool
- Text tool
- Lasso tool
Photoshop is part of the Adobe Creative Cloud, which also includes other popular tools such as Adobe Illustrator, Photoshop Lightroom, and Adobe Dreamweaver. Photoshop Creative Cloud allows users to work on image and graphic content from anywhere.
You can upload and edit your own photos by signing up for a Photoshop plan or starting a free trial. Additionally, you can try out some of Photoshop’s most popular tools and uses online with the help of guided tutorials without creating an Adobe account.
What is a Clipping Path?
A clipping path is a closed vector path or shape used to cut out a 2D image in editing software like Adobe Photoshop and Adobe Illustrator.
It serves as a digital outline or path created around an object in image editing software, such as Photoshop, using a pen tool. This path is then employed to select the object, enabling the user to remove the background or other unwanted elements from the image.
Clipping paths are a widely used technique in graphic design and image editing, offering versatility for various purposes:
- Creating composite images
- Removing distracting elements from an image
- Changing the background
- Cropping
- Drop shadow
- Enhancing images
- Applying color correction
Precision and attention to detail are crucial in this process to ensure a natural-looking result.
Different types of clipping paths exist, including single-layer clipping paths. Single-layer clipping paths are simple paths created on one layer with the Pen tool in Photoshop. They prove useful when removing or changing the background for subjects with simple, straight edges.
How to Create a Clipping Path in Photoshop?
Using the Pen Tool in Photoshop, you can cut the object into a desired shape by applying the clipping path. Then, you can manipulate the background to your liking.
Steps to Create a Clipping Path in Photoshop:
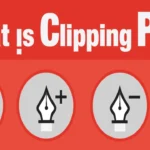
- Select Pen Tool: Check the left toolbar; you will find the Pen tool there.
- Selecting Path:
- Drawing Path:
- Drawing Clipping Path Around the Subject:
- Make Selection:
- Add Smoothness:
- Make a Duplicate Layer and Mask it:
- Choose Pen Tool and Use:
Detailed Steps:
- Launch Photoshop and upload your image.
- Select the Pen Tool from the Main Toolbar.
- Begin drawing the exact shape of your image.
- Go to the Layer Panel and save the path.
- Save as a Photoshop PSD from the File Menu.
- Double-click on “Add Layer Mask” in the Layer Panel.
For more information, check out our other article: What is Color Correction?